
This post may contain affiliate links. Please see my disclosure policy for more information.
Caramel Cheesecake Butter Bars (Easy Creamy Dessert Bars)
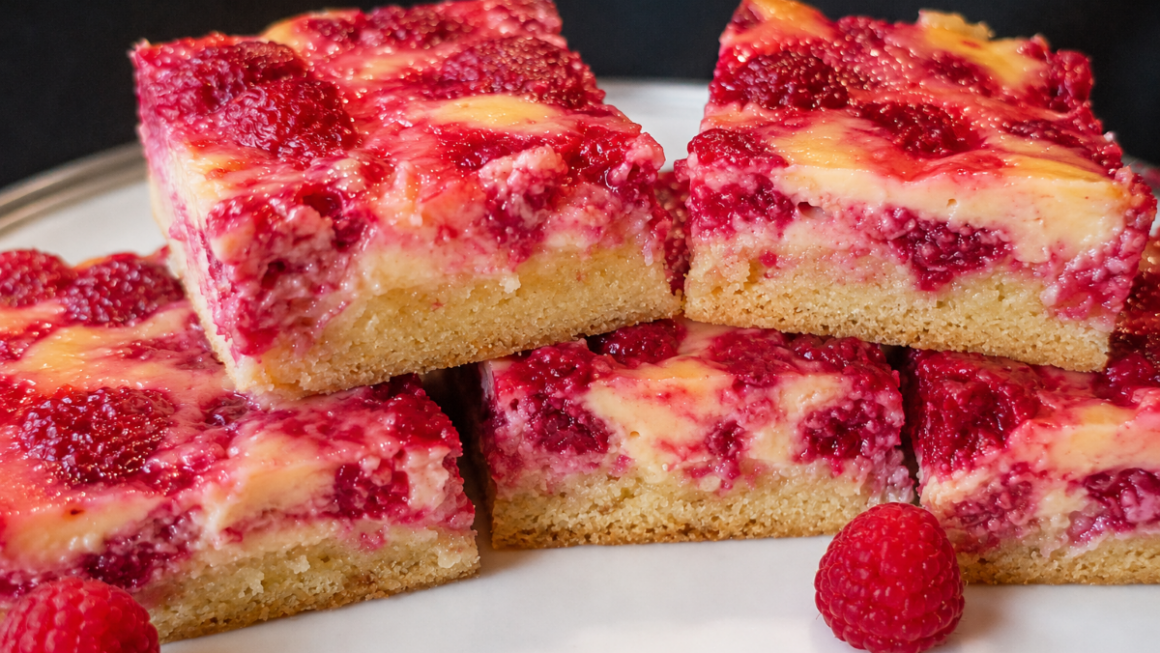
If you love rich cheesecake and buttery dessert bars, these Caramel Cheesecake Butter Bars are the perfect combination of both. A thick, buttery shortbread-style crust is topped with a creamy cheesecake filling and finished with a drizzle of homemade caramel sauce for an irresistible dessert that’s perfect for holidays, potlucks, family gatherings, or anytime you’re craving something sweet.
These bars are easier to make than a traditional cheesecake, but still deliver all the creamy flavor you love. The buttery crust provides the perfect foundation for the silky cheesecake layer, while the caramel topping adds a delicious finishing touch.
Why You’ll Love These Caramel Cheesecake Butter Bars
- Rich and creamy cheesecake filling
- Buttery homemade crust
- Easy caramel topping
- Perfect make-ahead dessert
- Great for parties and holidays
Ingredients
Butter Bar Crust
- 1 cup butter, softened
- ½ cup granulated sugar
- ¾ cup powdered sugar
- 1 tablespoon vanilla extract
- 2 cups sifted all-purpose flour
Cheesecake Filling
- 2 (8-ounce) packages cream cheese, softened
- ½ cup sour cream
- ½ cup granulated sugar
- 2 eggs
- 2 teaspoons vanilla extract
Caramel Topping (Optional)
- 5 ounces caramel candies, unwrapped (about 18 caramels)
- 2 tablespoons cream, half-and-half, or milk
- ¼ teaspoon vanilla extract
How to Make Caramel Cheesecake Butter Bars
Step 1: Prepare the Crust
Preheat your oven to 350°F. Lightly spray a 13 x 9-inch baking pan with cooking spray or line it with parchment paper for easy removal.
In a large mixing bowl, beat together the butter, granulated sugar, and powdered sugar until light and creamy. Mix in the vanilla extract.
Gradually add the sifted flour, one cup at a time, mixing on low speed until a soft dough forms.
Press the dough evenly into the bottom of the prepared pan and about ½ inch up the sides.
Step 2: Make the Cheesecake Filling
In a medium bowl, beat the softened cream cheese, sour cream, and sugar until smooth and creamy.
Add the eggs and vanilla extract and continue mixing until fully combined.
Pour the cheesecake mixture over the crust and spread evenly.
Step 3: Bake
Bake for 40 to 45 minutes. The edges should be set while the center remains slightly jiggly.
Remove from the oven and cool on a wire rack for at least 30 minutes.
Transfer to the refrigerator and chill for at least 3 hours, or overnight for best results.
Step 4: Prepare the Caramel Topping
Place the unwrapped caramels and cream in a microwave-safe bowl.
Microwave on high, stirring every 30 seconds until the mixture is melted and smooth.
Stir in the vanilla extract.
Drizzle over the chilled cheesecake bars just before serving. If the caramel thickens, simply reheat it briefly in the microwave.
Tips for Perfect Cheesecake Bars
Use Room Temperature Ingredients
Softened cream cheese blends more easily and helps create a smooth, lump-free filling.
Don’t Overbake
The center should still have a slight jiggle when you remove it from the oven. The bars will continue to set as they cool and chill.
Chill Thoroughly
For clean slices and the best texture, refrigerate the bars for several hours before cutting.
Line the Pan with Parchment Paper
Parchment makes it easy to lift the entire dessert out of the pan for neat slicing.
Easy Variations
You can use store-bought caramel topping, chocolate sauce, jam, pie filling, fresh fruit, or no topping at all.
Salted Caramel Cheesecake Bars
Sprinkle flaky sea salt over the caramel drizzle for a sweet-and-salty treat.
Chocolate Caramel Cheesecake Bars
Add mini chocolate chips to the cheesecake filling or drizzle melted chocolate over the caramel topping.
Pecan Caramel Cheesecake Bars
Top with chopped toasted pecans for extra crunch and flavor.
Turtle Cheesecake Bars
Combine caramel, chocolate drizzle, and pecans for a dessert inspired by classic turtle candies.
Storage Tips
Store covered in the refrigerator for up to 5 days.
You can also freeze the bars without the caramel topping for up to 3 months. Thaw overnight in the refrigerator and add fresh caramel before serving.
Frequently Asked Questions
Can I make these ahead of time?
Yes! These bars are actually better when made a day ahead because the cheesecake has time to fully set.
Can I use homemade caramel sauce?
Absolutely. Homemade caramel sauce works beautifully in place of melted caramel candies.
How do I get clean slices?
Use a sharp knife dipped in warm water and wipe it clean between cuts.
These Caramel Cheesecake Butter Bars combine the best of two desserts—a buttery cookie bar and a creamy cheesecake. They’re rich, indulgent, and surprisingly simple to make. Whether you’re serving them at a holiday gathering or enjoying them as a weekend treat, they’re sure to disappear quickly.
Don’t forget the caramel drizzle-it takes these cheesecake bars to the next level!
You May Also Like:

Caramel Cheesecake Butter Bars
Ingredients
Butter Bar Crust
- 1 cup butter
- ½ cup sugar
- ¾ cup powdered sugar
- 1 Tbs vanilla
- 2 cups sifted all-purpose flour
Cheesecake Filling
- 2 (8 oz) packages cream cheese, softened
- ½ cup sour cream
- ½ cup sugar
- 2 eggs
- 2 tsp vanilla
Caramel Topping (Optional)
- 5 oz caramel candies, unwrapped (approx. 18)
- 2 Tbs cream, half & half or milk
- ¼ tsp vanilla
Instructions
Butter Bar Crust
- Preheat oven to 350°F. Lightly spray the bottom and sides of a 13 x 9-inch pan with cooking spray or line it with parchment paper.
- In a large mixing bowl, combine the butter and sugars. Mix on medium speed until creamy. Add 1 Tbs. Vanilla and combine. Add the sifted flour 1 cup at a time, and beat on low until soft dough forms.
- Press dough in the bottom and ½ inch up the sides of the pan.
Cheesecake Filling
- In a medium mixing bowl, beat cream cheese, sour cream, and sugar with an electric mixer on medium speed until smooth. Add 2 eggs and 2 teaspoons vanilla; beat until smooth. Spread over the crust in the pan.
- Bake for 40-45 minutes, the center will still be slightly jiggly. Cool on a rack at room temperature for at least 30 minutes. Then refrigerate for at least 3 hours to overnight. Store covered in the refrigerator.
Caramel Topping
- Place the unwrapped caramels and cream in a microwave-safe bowl. Microwave on high, stirring every 30 seconds until smooth. Add ¼ tsp vanilla. Stir to combine. Drizzle on cheesecake right before serving. Keep it in the microwave-safe dish so you can remelt it if needed. Or add a topping of your choice.
Nutrition

- Package Includes: One (1) Reynolds Kitchens Unbleached Parchment Paper Roll measuring 45 feet long by 12 inches wide (45 square feet total)
- Easy and Quick Cleanup: The 12-inch wide baking parchment paper easily lines most sheet pans and cookie sheets for easy clean-up
- Unbleached and Chlorine-Free: This unbleached parchment paper is made with 75% unbleached fibers and 0% chlorine bleaching
- Dependable, Non-Stick, and Versatile: Reynolds parchment paper can be used for cooking, baking, and in the microwave, and is oven-safe up to 425 degrees Fahrenheit
- Quality Parchment Paper: Reynolds parchment paper is your go-to solution for easy cooking and clean-up


- SHIPMENT CONTAINS: 90 square feet of parchment paper, 24 yards x 15 inches per roll for all your baking needs
- PERFECT FIT: 15-inch width fits perfectly into most standard baking pans for convenient food preparation
- OVEN SAFE: Cooking paper withstands high temperatures up to 425 degrees and prevents food from sticking to the pan
- VERSATILE USE: Ideal for baking cookies, cakes, bread and lining pans for roasting vegetables and other foods
- NON-STICK SURFACE: Prevents food from sticking to pans, making cleanup easy and quick

- 2 Lb Bag: Stock your candy bowl with approximately 130 individually wrapped caramel cubes, giving you plenty of soft and satisfying caramel candy for sharing, snacking, parties, and everyday treats
- Vanilla Touch: Each piece combines the rich, buttery taste of caramel with a smooth hint of vanilla, creating a comforting flavor that makes every little cube worth unwrapping
- Classic Caramel Chew: Enjoy the rich, buttery flavor of traditional caramels with a satisfying, substantial bite that makes this classic chewy candy a treat to savor
- A Sweet Treat for Every Season: These golden caramel cubes are right at home in fall candy bowls and Thanksgiving spreads, but their timeless flavor makes them equally delicious for parties, offices, gift baskets, and year-round snacking
- Individually Wrapped for Easy Sharing: Every piece of caramel candy comes in its own wrapper, making these classic caramels convenient for candy dishes, lunch boxes, party favors, reception areas, and sweet treats on the go
- 1 Lb Bag: Stock your candy bowl with approximately 65 individually wrapped caramel cubes, giving you plenty of soft and satisfying caramel candy for sharing, snacking, parties, and everyday treats
- Vanilla Touch: Each piece combines the rich, buttery taste of caramel with a smooth hint of vanilla, creating a comforting flavor that makes every little cube worth unwrapping
- Classic Caramel Chew: Enjoy the rich, buttery flavor of traditional caramels with a satisfying, substantial bite that makes this classic chewy candy a treat to savor
- A Sweet Treat for Every Season: These golden caramel cubes are right at home in fall candy bowls and Thanksgiving spreads, but their timeless flavor makes them equally delicious for parties, offices, gift baskets, and year-round snacking
- Individually Wrapped for Easy Sharing: Every piece of caramel candy comes in its own wrapper, making these classic caramels convenient for candy dishes, lunch boxes, party favors, reception areas, and sweet treats on the go

- 9x13 INCH: Includes (1) 9x13x2.75 inch glass baking dish with BPA-free plastic lid. This deep baking dish is essential to have in any kitchen as they are versatile in use from prepping to baking and storing.
- GO DEEPER: At up to 50% deeper than the Pyrex basics dishes you know and love, there’s more room to get creative. Deeper size stops spillovers, and more importantly, holds more of the good stuff for your parties and gatherings.
- SNUG FIT LID: Perfectly fitting and BPA-free plastic lid is freezer, microwave, and top-rack dishwasher safe. No need to hold back when warming your food or storing your leftovers for tomorrow.
- GLASS BAKEWARE: High-quality non-pourous glass is pre-heated oven, microwave and freezer safe. Have a peace of mind when storing your food, resisting stains, flavors and odors. Worry less about scrubbing hard to get rid of stains or smells, and enjoy the versatile convenience of this glass bakeware set.
- PYREX IS THE #1 BRAND OF GLASS BAKEWARE*: Loved for generations, experienced cooks and beginners alike have reached for Pyrex brand glassware products, because they’re affordable, durable, and great for all their cooking, serving and storing needs. Source: The NPD Group / Retail Tracking Service, dollars and units, 12 ME December 2022

- 💥【Pay Attention to Size】Lasagna Baking Dish with Handle Overall Size (LxWxH): 13.9x9.1x2.2 inches. Inner Usable Size (LxWxH): 11.7x8.6x2.05 inches. Capacity: 2.6 qt. ❗❗Please make sure it can fit in your microwave or oven before buying. ✅ Rectangular glass baking pan are perfect for lasagna, and the food heats evenly.
- 🥑【Clear Glass Material】Our baking dish are made of tempered glass, can withstand temperatures from -4ºF to 540ºF. NUTRIUPS glass baking pan is suitable for microwave, oven, refrigerator, freezer and dishwasher.
- 🥦【Double Handles Design】There are small handles on both sides of the glass baking dishes for oven, which not only takes up no extra space, but also makes it easy to move from the oven or freezer to the table.
- 🍅【Stackable Baking Dishes】NUTRIUPS baking dishes are stackable, they can be stacked in the same size or different size, so that you can sort your kitchenware and bakeware more easily than before.
- 🥩【Versatile Use】Glass is a relatively durable material that can withstand heat and cold and will not react with food, making it safe and reliable, so it is very versatile. Not only can it be used for baked desserts, casserole dishes, stews, lasagna, pasta, brownies, chicken, meat, beef, fish, vegetables, and all your favorite cuisines, but it can also be used as a serving platter for added convenience and reheating leftovers.